Decide the water path before deciding the stone. A seamless wet room can look monolithic only when drainage, waterproofing, slip resistance, heating, seating, glass, and maintenance are coordinated before the finish schedule becomes final.
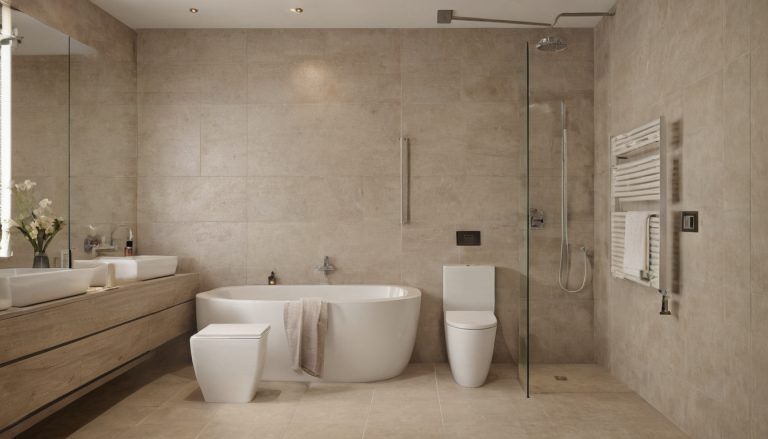
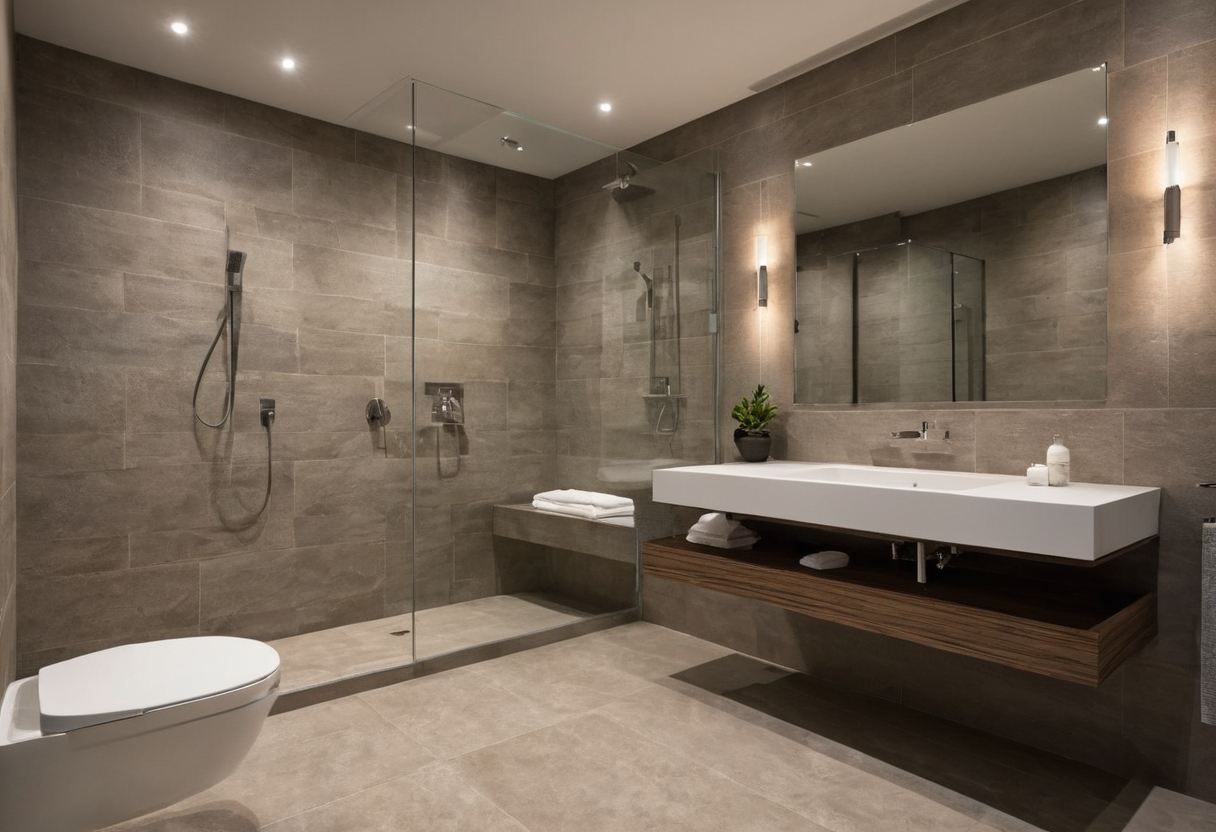
A luxury wet room should be planned from water movement before finishes are selected
A high-end bathroom wet room succeeds when the drainage path, waterproofing envelope, finished floor height, and user clearances are resolved before stone, glass, or brassware choices. Curbless primary suites, guest bath wet rooms, and accessible bath renovations need seamless detailing that still respects local code and manufacturer limits.
The first design decision is not marble versus porcelain. The first decision is where water lands, where water travels, where water stops, and how the floor assembly protects the structure below. A wet room that looks monolithic in the rendering can fail in use if the drain, threshold, heat cable, stone module, and glass screen get designed as separate luxuries.
- Confirm the room type. A primary suite wet room can prioritize daily comfort and concealed storage, while a guest bath wet room may need simpler splash control and more intuitive circulation. An accessible bath renovation must bring code and reach requirements into the first layout meeting.
- Confirm the jurisdiction. The project team should identify the governing plumbing, waterproofing, threshold, and accessibility rules before approving a curbless floor or flush transition.
- Confirm the subfloor. Concrete slabs, timber joists, engineered floor cassettes, and radiant-heated assemblies create different recess depths, drain routing options, and finished-floor-height constraints.
- Confirm the threshold limit. The bathroom entry and adjacent room floor height determine whether a seamless wet room can be recessed, ramped, or detailed with a controlled transition.
- Confirm the finish intent. Large-format stone, mosaic stone, porcelain stone-look tile, and slab wall cladding each change grout joints, slope tolerance, handling, and installation sequencing.
The wet room planning sequence is drain, slope, waterproofing, heat, stone, glass, then fittings
Start with the drain because the drain fixes the lowest point of the room. The plumber, tile installer, waterproofing contractor, architect, interior designer, and stone supplier should agree on the drain body, outlet direction, flange condition, screed build-up, and tile thickness before the finish palette becomes contractual.
The waterproofing connection at the drain deserves early scrutiny. Schluter states that the KERDI-DRAIN bonding flange provides a large contact area for a secure connection to the waterproofing membrane at the top of the drain assembly when installed according to Schluter’s membrane bonding procedure. That detail explains why the drain cannot be treated as a decorative grate selected after stone procurement.
A luxury wet room should be planned from water movement before finishes are selected shown as a planning reference for layout, scale, and material decisions.
Plan underfloor heat before the stone layout locks. Schluter states that the DITRA-HEAT-E-HK heating cable cannot be cut to fit, so the cable length and route must be selected before installation. In a luxury wet room, benches, drain locations, glass fixings, and dry approach areas all affect heat planning.
The subject wet room must define wet zone, splash zone, and dry circulation zone separately
Divide the plan into three working zones before materials are approved. The active wet zone covers the shower floor that receives direct water from the main shower head, body sprays, or hand shower. The splash zone covers the floor and walls reached by intermittent spray. The dry circulation zone covers the approach path, towel access, vanity movement, and entry route.
This zoning prevents the whole bathroom from receiving one generic finish specification. The continuously wet shower floor needs the most disciplined drainage and traction thinking. The splash zone needs compatible waterproofing and cleaning strategy. The dry circulation zone needs comfort, threshold control, and enough space to move without brushing the glass or bench.
Once the zones are drawn, the next design question becomes precise: what slope lets a seamless wet room drain cleanly without making the stone floor feel awkward underfoot?
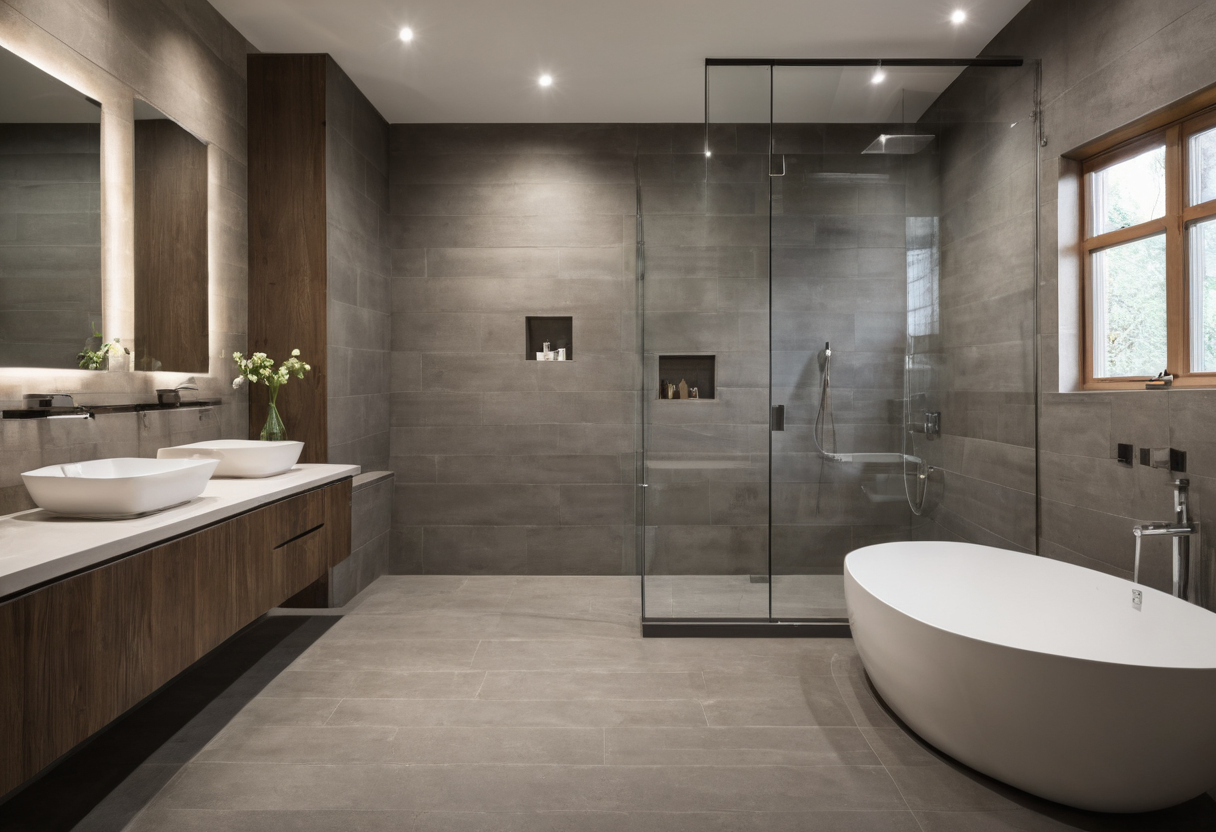
What drain slope should a luxury wet room use for seamless drainage?
A luxury wet room floor needs a deliberate fall toward a linear or point drain that clears water without making the surface feel tilted underfoot. The correct slope depends on local code, drain instructions, tile or stone format, shower output, waterproofing build-up, and whether the entry is curbed, low-threshold, or fully curbless.
- Confirm the permitted slope range first. Ask the designer, plumber, and tile contractor to verify the local minimum and maximum shower-floor slope before approving a stone layout.
- Match the drain type to the floor geometry. A linear drain favors a single-plane fall, while a point drain usually asks the floor finish to turn in more than one direction.
- Check shower output before choosing the grate. Rain heads, hand showers, body sprays, and simultaneous-use valves can make a beautiful drain underperform if the drain assembly, trap, pipework, and venting are not sized as one system.
- Review finish chemistry during slope corrections. If primers, adhesives, sealers, or other VOC-emitting products are used indoors, the U.S. Environmental Protection Agency recommends increasing ventilation during product use.
Linear drains create cleaner stone layouts only when the floor can fall in one plane
Choose a linear drain when the wet room can send water toward one edge without twisting the stone surface. A wall-side drain can keep the visual field calm because the main floor plane falls in one direction. A threshold-side or intermediate drain can also work, but the recess depth, outlet direction, and finished-floor transition must support the chosen position.
The drain body must coordinate with waterproofing before the slab or tile pattern becomes final. Schluter states that KERDI-LINE includes a channel body with an integrated bonding flange, when installed with compatible Schluter waterproofing components. That flange detail matters because a linear drain is not just a slot in the floor. It is a waterproofing junction, a height datum, and a layout constraint.
Approve a linear drain only after the team marks the high point, low point, stone thickness, drain flange height, and outlet route on one coordinated section drawing. If the drawing needs small wedges, awkward edge cuts, or a raised threshold to make the drain fit, the wet room is not yet seamless.
Point drains work best when smaller floor modules can form a four-way fall
Select a point drain when the shower floor can pitch from several directions into one grate. Smaller tile modules often handle this compound fall better than large-format stone because each piece can follow the surface change with fewer visible conflicts. The design consequence is clear: the floor may look less monolithic, but it can drain with fewer forced cuts and less lippage risk.
The point-drain decision should include the grate size, bonding flange detail, tile module, and installer tolerance for wet-area surface flatness. If the client wants a large stone field around a central drain, the team should mock up the fall before ordering the finish. A premium wet room fails visually when the floor looks flat but leaves water standing, and it fails technically when the surface drains but feels faceted under bare feet.
Drain capacity must be checked against luxury shower flow, not just drain appearance
Size the drainage system around actual shower use, not showroom photography. A thin grate may look precise beside book-matched stone, but the wet room still has to manage water from every outlet the user can run at the same time. The plumber should verify the drain’s rated capacity under the selected grate, outlet, trap, pipe configuration, and local plumbing rules.
What drain slope should a luxury wet room use for seamless drainage shown as an editorial reference for proportion and finish coordination.
The slope decision also affects the waterproofing decision. Schluter-KERDI has anchoring fleece on both sides to bond with thin-set mortar, when used with compatible thin-set mortar and Schluter installation methods. That means the floor fall, membrane bond, drain flange, and stone setting bed must align before finish approval. Once the slope is fixed, the next checkpoint is the full assembly: waterproofing, thresholds, and underfloor heating designed together rather than adjusted after framing.
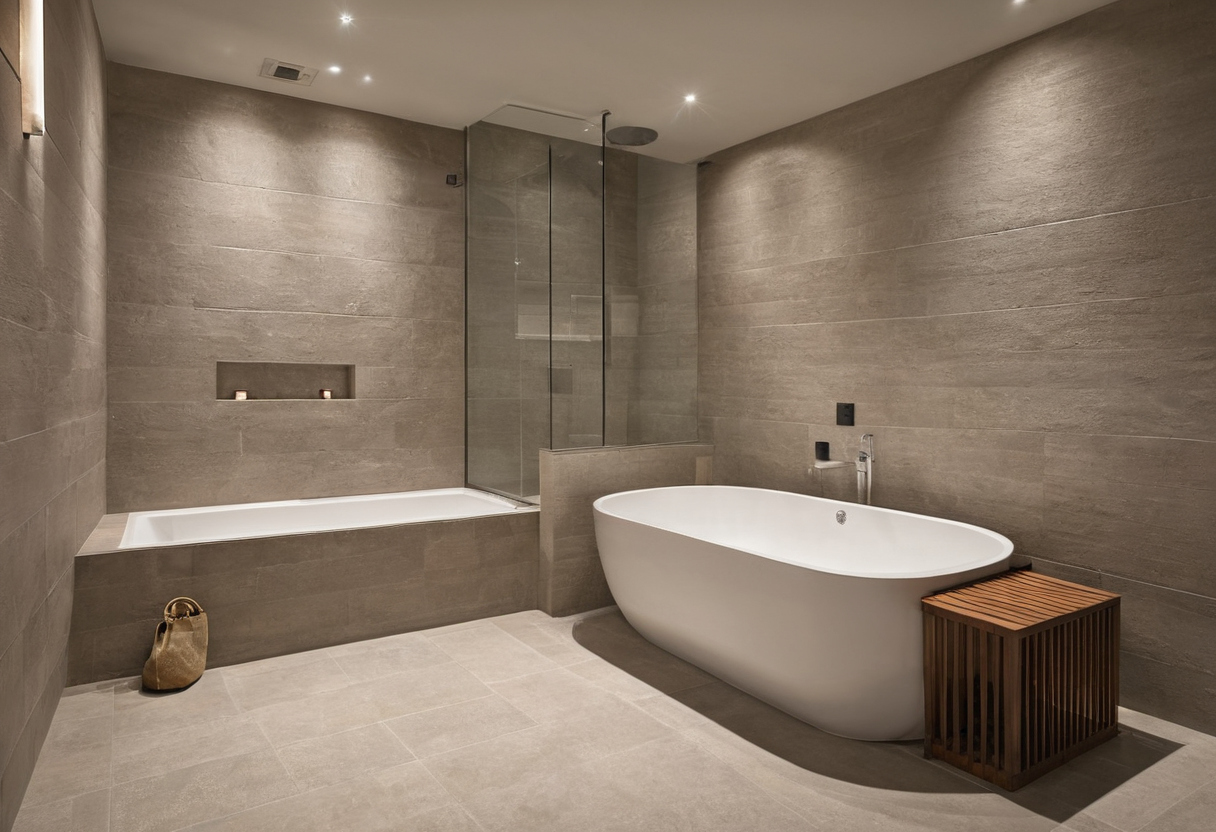
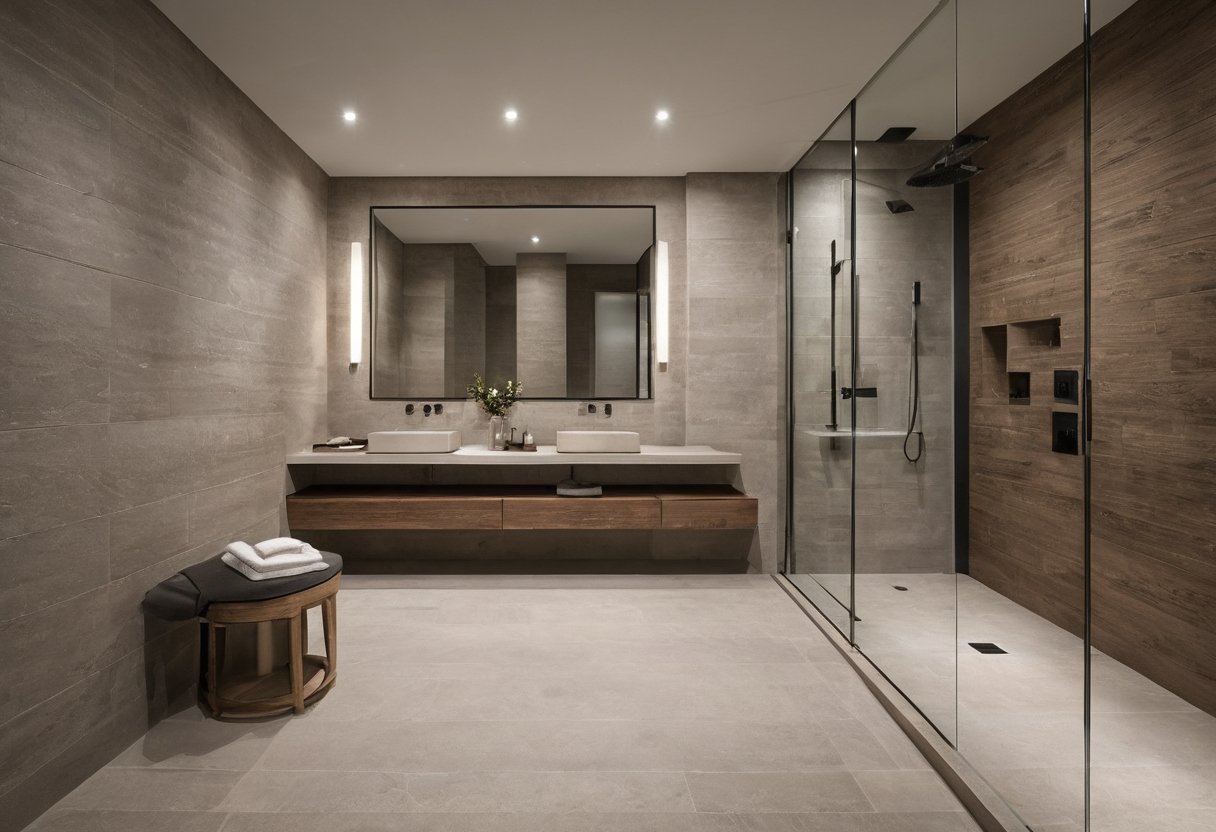
Waterproofing, thresholds, and underfloor heating must be designed as one wet-room assembly
The subject wet room should be specified as one compatible assembly, not as separate premium products layered on site; waterproofing, drain flanges, heating, screeds, adhesives, stone, thresholds, and sealants must agree with the project substrate, climate, code jurisdiction, and warranty conditions.
| Assembly decision | What to confirm before ordering finishes | Design consequence |
|---|---|---|
| Sheet waterproofing | Schluter-KERDI is specified by Schluter as an 8-mil, pliable, sheet-applied polyethylene waterproofing membrane and vapor retarder when installed according to Schluter instructions. | The designer must draw seams, corners, penetrations, wall returns, and drain tie-ins before the stone layout becomes fixed. |
| Linear drain | Schluter-KERDI-LINE is a low-profile linear floor drain designed for bonded waterproofing assemblies, and Schluter describes it as suitable beside walls or at intermediate locations in showers and wet rooms where the framing depth, outlet, slope, and waterproofing details suit the selected model. | A wall drain can sharpen the monolithic look, but the floor structure and waste route must allow the recess and fall. |
| Point drain | Schluter-KERDI-DRAIN is a floor drain with an integrated bonding flange for connection to Schluter-KERDI or other bonded waterproofing assemblies when installed as part of an approved bonded shower assembly. | The tile setter needs the drain body, flange height, membrane method, and floor fall resolved before screed work begins. |
| Floor warming | Schluter-DITRA-HEAT-E-HK is an electric floor-warming cable designed for the Schluter-DITRA-HEAT uncoupling membrane, and Schluter identifies the cable as available in 120 V and 240 V options. | The electrical plan, thermostat location, membrane compatibility, and heated areas must be coordinated before the wet-room floor build-up closes. |
A curbless wet room needs a recessed floor build-up or carefully managed transition
Confirm the available recess depth before approving a flush threshold. A curbless wet room still needs space for structure, slope, waterproofing layers, drain body, mortar, adhesive, and stone. If the bedroom, dressing room, or corridor floor sits too high or too low, the entry detail may need a tapered transition rather than a perfectly level visual line.
The threshold drawing should show the finished floor heights on both sides of the bathroom entry, the permitted threshold condition under the local code or accessibility brief, and the glass screen or door track detail. This checkpoint protects the quiet luxury gesture: no improvised metal strip, no awkward stone lip, and no water path into the dry circulation zone.
Waterproofing, thresholds, and underfloor heating must be designed as one wet-room assembly shown with floor, wall, and fixture relationships visible.
Flood testing should be scheduled before stone installation hides defects
Schedule the flood test after waterproofing cures and before the stone installer covers the membrane. The responsible contractor should document the test method, inspection requirement, and sign-off expected by the local jurisdiction or membrane manufacturer. The goal is simple: prove the waterproofing plane before expensive slabs, mosaics, or book-matched stone make access destructive.
Quality control should include corners, niches, pipe penetrations, bench returns, threshold junctions, and the drain connection. The wet room may look minimal at completion, but the inspection record should read like a technical dossier.
Radiant heat improves comfort only when it stays outside prohibited drain and membrane zones
Coordinate radiant heat as part of the waterproofing assembly, not as a comfort upgrade added late. Heating cable or mat layouts need manufacturer-approved setbacks from drains, walls, benches, glass fixings, and penetrations, plus confirmation that the selected stone adhesive, grout, membrane, and sealant can tolerate the planned operating conditions.
Indoor finish planning should also include curing and material-odor awareness. The U.S. Environmental Protection Agency identifies paints, varnishes, waxes, cleaning products, building materials, and furnishings as common indoor sources of volatile organic compounds, so the wet-room schedule should avoid trapping fresh finish work inside a sealed luxury suite. Once the assembly is coordinated, the next question becomes more tactile: which stone surface can look refined while staying credible under wet feet?
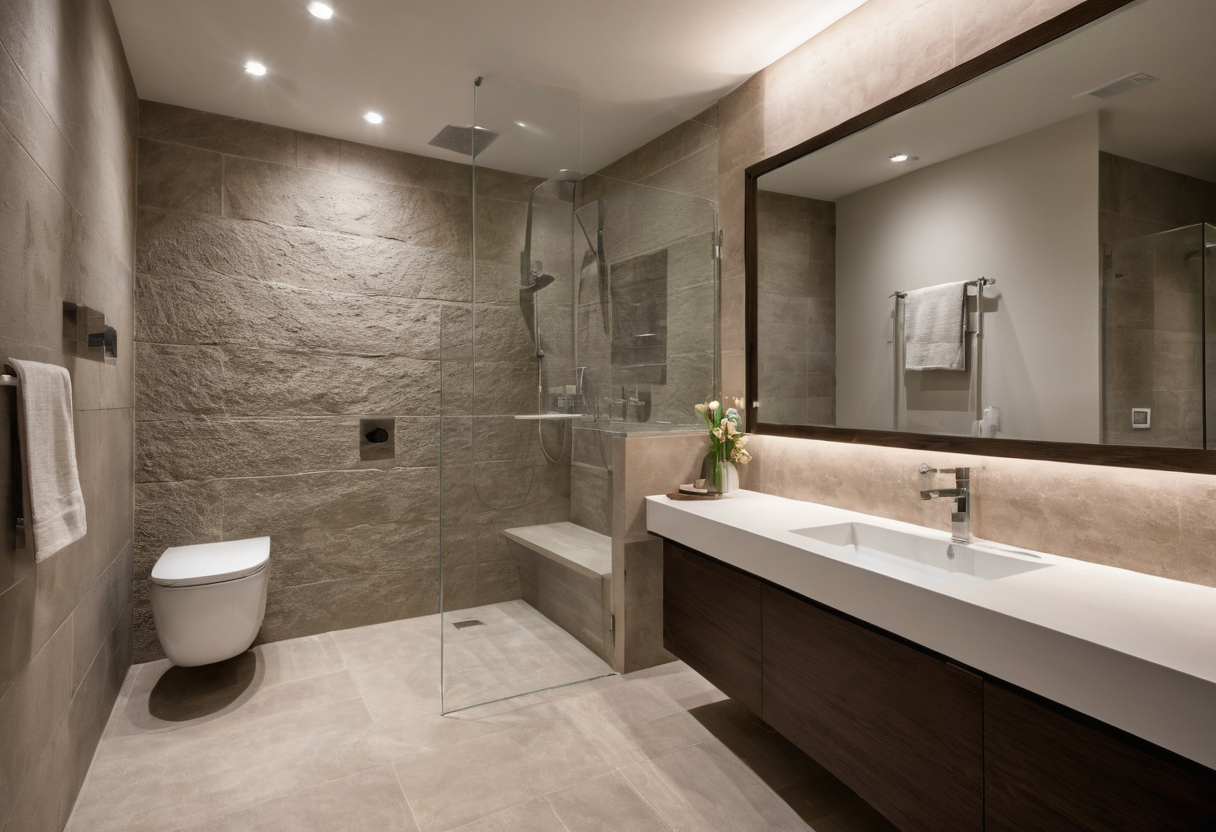
Which stone slip ratings are suitable for a high-end wet room floor?
A luxury wet room floor should be selected by tested wet slip performance first and visual refinement second. Honed, brushed, flamed, bush-hammered, tumbled, or micro-textured stone can all look premium, but suitability depends on the testing method, wet-zone exposure, sealer choice, maintenance plan, and local liability expectations.
Which stone slip ratings are suitable for a high-end wet room floor shown with floor, wall, and fixture relationships visible.
The stone approval should require a material submittal that names the applicable slip-resistance method for the project market, such as DCOF, R-rating, Pendulum Test Value, or another locally accepted reference. The submittal should also state whether the result applies to wet barefoot use, wet shod use, dry use, or a different test condition. A beautiful sample without that context does not answer the wet-room question.
- Request test results for the exact stone finish, not only the stone species.
- Confirm that the proposed finish sits inside the active wet zone, splash zone, or dry circulation zone.
- Ask the stone supplier whether the proposed sealer changes surface friction in wet conditions.
- Match the cleaning schedule to the supplier’s stone-care instructions before the floor is installed.
Polished stone is usually unsuitable inside the active wet zone despite its luxury appearance
Polished marble, limestone, travertine, quartzite, or similar stone should not enter the active shower floor by appearance alone. The active wet zone needs a surface that still gives the foot feedback under running water, soap residue, and body oils. If the design intent calls for a polished wall or vanity slab, keep that gloss away from the floor plane where a guest steps, turns, or sits.
The better luxury decision is to keep the same palette and change the finish. A honed or micro-textured version of the same stone can preserve veining and color continuity while giving the wet-room floor a more defensible performance profile. The designer should ask the supplier for wet barefoot guidance on the specific finish before the client approves the sample board.
Large-format stone needs both slip resistance and slope-compatible fabrication
Large-format stone creates the monolithic look clients want, but the floor still has to fall cleanly to the drain. A slab that looks calm on a showroom wall may fight the geometry of a wet-room floor if the drain layout requires cuts, breaks, or a change in plane. The fabricator should confirm the maximum installable piece size for the proposed floor fall before bookmatching or vein-matching gets locked.
Waterproofing remains a separate approval from stone selection. Schluter identifies KERDI as suitable for tiled showers, bathtub surrounds, and other wet areas when installed as part of a Schluter-approved bonded waterproofing assembly. That suitability supports the wet-area assembly, not a blanket approval for every stone finish on top of it.
Quartz slab data shows why large panels need early handling review, even though quartz data does not prove natural-stone slip safety. Cambria lists jumbo slab dimensions of 132 by 65.5 inches and standard slab dimensions of 122 by 55.5 inches for its quartz surface planning, with approximate weights of 10 pounds per square foot for 2 cm material and 15 pounds per square foot for 3 cm material where those products apply. A wet-room team should treat that kind of information as a reminder to coordinate access, structure, cutting, and installation sequencing before approving a seamless panel concept.
Stone sealers and cleaners can change wet-room traction over time
Stone traction is not a one-day approval. Sealer choice, cleaner chemistry, residue, and abrasion can change how a wet-room floor feels after months of use. The specification should assign responsibility to the homeowner, house staff, or property manager for approved products and maintenance intervals.
The Natural Stone Institute says natural stone surfaces should be cleaned with neutral cleaners, stone soap, or a mild liquid dishwashing detergent and warm water, subject to the stone supplier’s project-specific recommendations. The same guidance warns against scouring powders or creams because abrasives may scratch natural stone. Once the floor finish is chosen, the next risk is human comfort around it, so bench clearances, controls, and glass screens need dimensions before the wet room is framed.
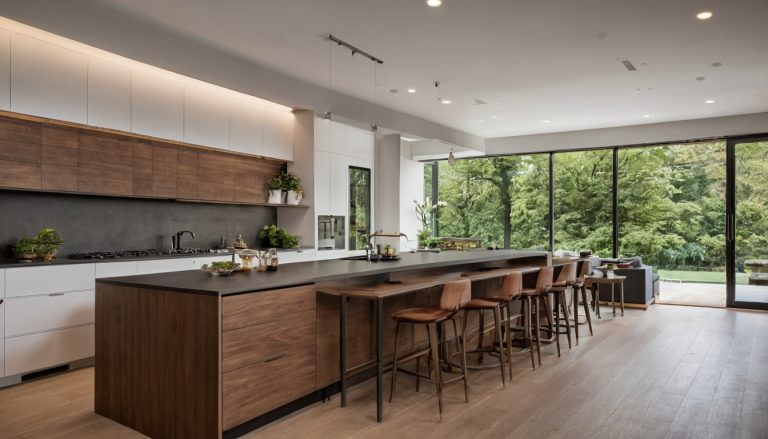
Bench clearances, controls, and glass screens should be dimensioned before the wet room is framed
A premium wet room feels effortless when the bench, controls, shower heads, glass, niches, towel access, and circulation clearances are dimensioned before rough framing. This planning matters for long-term comfort, accessible use, and couples’ bathrooms where more than one person may move through wet and dry zones at once.
Diagnose the room before framing by naming the real users first. A single primary user may want a generous seated shaving position. A couple may need passing space and separate towel access. Guests need intuitive controls. Older adults, children, and mobility-aid users need blocking, reach, and entry planning that follows the adopted local accessibility rules for the project.
- User profile: document who will use the wet room daily, occasionally, and with assistance.
- Bench type: choose a floating stone slab, framed tiled bench, fold-down seat, or freestanding stool before wall structure is closed.
- Support plan: confirm blocking, substrate, waterproofing continuity, and stone or tile build-up before ordering finishes.
- Movement plan: reserve clear floor space around the bench, entry, toilet, vanity, towel zone, and glass opening.
- Splash plan: align glass size and shower head direction with the dry circulation path.
A wet-room bench must be comfortable, reachable, and outside the strongest water impact when possible
The wet-room bench should be drawn as a working fixture, not as a styled ledge. Set the bench height, depth, usable width, and edge profile from the user profile, local accessibility requirements where applicable, and a full-scale site mock-up if the client has specific mobility or comfort needs.
A floating stone slab creates a light architectural line, but the wall structure must carry the load and the waterproofing must remain continuous at supports. A framed tiled bench gives more mass and storage opportunities, but the top, front, corners, and wall junctions need clean drainage logic. A fold-down seat can protect floor area, while a freestanding stool works only if the floor finish grips well and the stool does not block the drain path.
The bench location should avoid the strongest direct spray where possible. Place the hand shower, niche, soap position, towel hook, and grab-bar blocking within a practical reach zone from the seated position. Bench-top slope should shed water toward the wet-room drain without creating a perched or sliding feeling. Treat this as clearance planning for elegant circulation, because comfort depends on the invisible space around the object as much as the object itself.
Shower controls should be reachable from the entry or bench without standing under cold water
Control placement reveals whether the wet room was planned for daily use or only for photographs. Position thermostatic controls, diverters, and digital controls so the user can start the shower from the entry side or seated position before stepping into the main spray. Confirm mounting locations with the selected valve and control manufacturer before plumbing rough-in.
The control wall should coordinate with shower head type, hand shower hose length, body spray direction, niche placement, and door or glass-panel clearance. Anti-scald, temperature-control, and inspection requirements belong in the plumbing review, not in a late finish meeting. A beautiful wall loses its calm if the user must reach through cold spray to adjust it.
Glass screens control splash only when matched to shower spray direction and room depth
Minimal glass works only when the shower spray, room depth, and dry-zone layout agree. Test the likely water path on the plan: overhead rain, angled wall shower, hand shower, and body sprays each send water differently. The glass panel should interrupt that path before water reaches the vanity, toilet, towel storage, or bathroom entry.
Glass planning should include panel width, panel height, return-panel need, opening direction, hardware fixing, cleaning access, and the timing of final templating after tile or stone installation. If the room needs a door, confirm swing and handle clearance before framing. The next step is to capture these drainage, waterproofing, stone, bench, control, and glass decisions in one preconstruction checklist before the wet-room specification is released.

Bench clearances, controls, and glass screens should be dimensioned before the wet room is framed shown as a planning reference for layout, scale, and material decisions.
The wet-room specification should include a preconstruction checklist for drainage, waterproofing, stone, and clearances
The most reliable luxury wet room starts with a written checklist that confirms slope intent, drain capacity, membrane compatibility, slip rating, heating zones, bench blocking, glass dimensions, inspection steps, and maintenance duties before work begins. Premium finishes leave little tolerance for late correction once stone, glass, and fittings arrive.
The designer should issue a wet-room performance schedule before finishes are ordered
The wet-room performance schedule turns the design from a visual concept into an accountable construction sequence. In an architect-led project, the architect may own the master schedule. In an interior-designer-led project, the designer should coordinate finishes with the licensed trades. In a design-build or contractor-led renovation, the builder should assign each sign-off to the correct specialist before rough work starts.
| Checklist field | Who should verify it | Approval checkpoint |
|---|---|---|
| Slope direction, drain type, and drain capacity | Architect, plumber, tile installer, or builder | Before rough plumbing and floor recess work |
| Waterproofing membrane, drain connection, seams, penetrations, and threshold transition | Waterproofing contractor, tile installer, builder, and local inspector where required | Before waterproofing, then again before stone installation |
| Stone finish, slip rating, sealer plan, grout, adhesive, and movement joints | Designer, stone supplier, fabricator, and tile installer | Before stone is ordered or fabricated |
| Underfloor heating layout, cable path, thermostat location, and compatibility with the wet-room assembly | Heating installer, electrician, tile installer, and builder | Before heat installation and before waterproofing layers are closed |
| Bench location, blocking, controls, niches, glass splash control, and door or panel clearances | Architect, designer, carpenter, plumber, and glass fabricator | Before framing is closed and again before glass templating |
The specification should also identify manufacturer warranty conditions before purchase. Drain, membrane, heating, stone, adhesive, grout, sealer, and glass suppliers may limit coverage when installers mix incompatible systems, alter components, skip required preparation, or ignore product instructions. The project team should capture those conditions in the schedule rather than discovering them after a failure.
The highest-risk wet-room failures are slow drainage, slippery stone, leaking transitions, and cramped benches
Slow drainage usually becomes visible only after the room looks finished, so the drain layout and floor fall deserve approval before the substrate is built. Slippery stone becomes a daily risk when the selected finish suits a showroom wall better than a wet walking surface. Leaking transitions often begin at thresholds, corners, penetrations, or drain interfaces. Cramped benches result from treating seating as a styling feature instead of a framed, reachable, splash-aware element.
Preconstruction correction is usually coordination: revise the drain location, adjust the floor build-up, change the stone finish, add blocking, relocate controls, or alter the glass line. Post-installation correction is usually disruption: remove finished materials, expose waterproofing, remake stone cuts, retest assemblies, or reorder glass. A luxury wet room should therefore require photographic documentation at rough plumbing, waterproofing, flood testing where required, heat layout, stone installation, and glass templating.
The wet-room specification should include a preconstruction checklist for drainage, waterproofing, stone, and clearances shown as an editorial reference for proportion and finish coordination.
The practical decision is simple: approve the wet-room performance schedule before approving the finish schedule, so the room earns its seamless appearance through verified drainage, grip, waterproofing, comfort, and serviceability.
FAQ
Can a luxury wet room use large-format marble on the shower floor safely?
Large-format marble can be considered only if the exact finish has appropriate wet-condition slip evidence for the project, the fabricator can make the pieces work with the required floor fall, and the waterproofing assembly remains compatible. A polished showroom sample is not enough for the active wet zone.
Is a linear drain better than a center drain for a curbless wet room?
A linear drain is better when the room can fall cleanly in one plane and the floor structure can accept the drain body, outlet, recess, and waterproofing connection. A point or center drain can be better when smaller floor modules can form the required fall without forcing large stone to twist.
How much slope does a wet room floor need without feeling uncomfortable?
The slope should meet the local code, drain manufacturer instructions, and tile or stone installation requirements while still feeling stable under bare feet. The project team should verify the permitted slope range before finalizing the drain location or stone pattern.
Can underfloor heating be installed under a waterproofed stone wet room?
Underfloor heating can be part of a stone wet room when the heating system, uncoupling membrane, waterproofing, adhesive, grout, thermostat, and drain layout are approved as one assembly. The cable route and heated zones must be planned before the floor build-up is closed.
What bench dimensions make a wet room comfortable for long-term use?
The right bench dimensions depend on the users, local accessibility requirements where applicable, the bench type, reach to controls and hand shower, splash exposure, and available circulation space. The bench should be mocked up or fully dimensioned before framing so blocking, waterproofing, and glass planning support the final layout.